
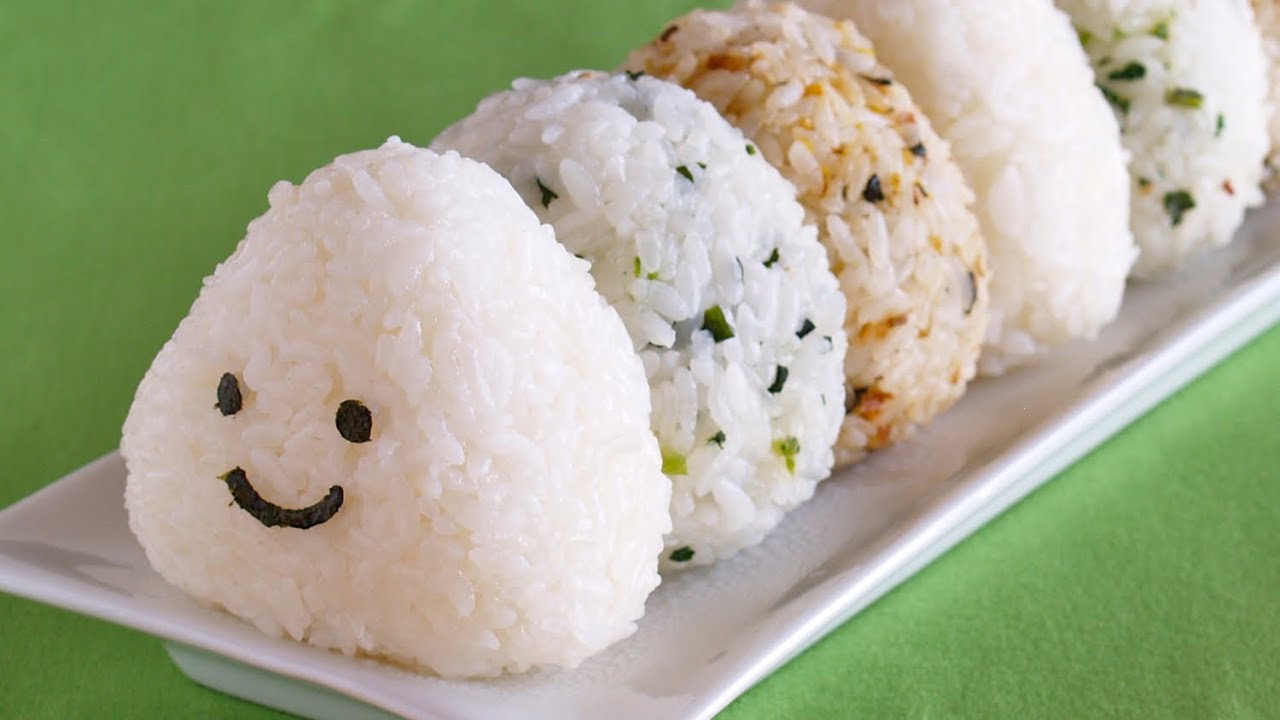
Onigiri, or Japanese rice balls, are a delightful and versatile snack that can be enjoyed at any time of the day. These rice balls are often filled with savory ingredients and wrapped in nori, making them both delicious and portable. Perfect for lunchboxes, picnics, or a quick bite, onigiri are a staple in Japanese cuisine.
When preparing onigiri, you might need to visit a specialty store or the international aisle of your supermarket for a few key ingredients. Japanese short-grain rice is essential for the right texture and stickiness. Nori, or seaweed sheets, are used to wrap the rice balls and add a unique flavor. If you choose to use a filling, canned tuna and mayonnaise are common options, but feel free to get creative with other fillings.
Ingredients For Onigiri Japanese Rice Balls Recipe
Japanese short-grain rice: This type of rice is essential for onigiri due to its sticky texture, which helps the rice balls hold their shape.
Water: Used to cook the rice, ensuring it reaches the perfect consistency.
Salt: Adds flavor to the rice and helps season your hands while shaping the onigiri.
Nori (seaweed): These sheets are cut into strips and wrapped around the rice balls, adding flavor and making them easier to handle.
Tuna: An optional filling that adds a savory element to the onigiri.
Mayonnaise: Often mixed with tuna to create a creamy and flavorful filling.
Technique Tip for Making Onigiri
When forming the onigiri, wetting your hands with water and sprinkling them with salt not only prevents the rice from sticking to your hands but also seasons the rice balls evenly.
Suggested Side Dishes
Alternative Ingredients
japanese short-grain rice - Substitute with sushi rice: Sushi rice is also a type of short-grain rice and has a similar sticky texture that is essential for forming onigiri.
japanese short-grain rice - Substitute with arborio rice: Arborio rice, commonly used in risotto, has a similar starchy quality that can help bind the onigiri together.
water - Substitute with dashi broth: Using dashi broth instead of water can add a subtle umami flavor to the rice.
salt - Substitute with soy sauce: Soy sauce can add a depth of flavor and a touch of saltiness to the rice.
nori - Substitute with rice paper: Rice paper can be used as an alternative wrap, though it will have a different texture and taste compared to nori.
nori - Substitute with shiso leaves: Shiso leaves provide a fresh, herbal flavor and can be used to wrap the onigiri.
tuna - Substitute with salmon: Canned salmon can be used as a filling and offers a similar texture and flavor profile to tuna.
tuna - Substitute with chicken: Canned or shredded chicken can be used as a filling for a different but still delicious protein option.
mayonnaise - Substitute with greek yogurt: Greek yogurt can provide a creamy texture similar to mayonnaise while adding a tangy flavor.
mayonnaise - Substitute with avocado: Mashed avocado can be used as a creamy, healthy alternative to mayonnaise.
Other Alternative Recipes Similar to Onigiri
How to Store / Freeze Onigiri
Allow the onigiri to cool completely before storing. This prevents condensation, which can make the rice soggy.
Wrap each onigiri individually in plastic wrap or place them in an airtight container. This helps maintain their shape and keeps them fresh.
Store the wrapped onigiri in the refrigerator if you plan to consume them within a day or two. For longer storage, freezing is recommended.
To freeze, place the individually wrapped onigiri in a single layer on a baking sheet. Once frozen solid, transfer them to a freezer-safe bag or container. This prevents them from sticking together and allows you to take out only what you need.
When ready to eat, thaw the onigiri in the refrigerator for a few hours or overnight. For a quicker option, use the microwave. Remove the plastic wrap and wrap the onigiri in a damp paper towel. Microwave on low power for 1-2 minutes until warmed through.
If the nori becomes soggy after refrigeration or freezing, you can replace it with fresh strips just before serving. This ensures a crisp texture and enhances the overall eating experience.
For added flavor, consider brushing the onigiri with a bit of soy sauce or sprinkling with furikake seasoning before wrapping in nori. This adds a delightful umami kick.
Keep in mind that onigiri with perishable fillings like tuna and mayonnaise should be consumed within a day if stored in the refrigerator. For longer storage, opt for fillings that freeze well, such as pickled plum or grilled salmon.
Label your storage containers with the date to keep track of freshness. This helps ensure you enjoy your onigiri at their best quality.
How to Reheat Leftovers
Microwave method:
- Place the onigiri on a microwave-safe plate.
- Cover with a damp paper towel to keep the rice moist.
- Microwave on medium power for 1-2 minutes, checking halfway to ensure even heating.
- Let it sit for a minute before enjoying.
Steaming method:
- Place the onigiri in a steamer basket.
- Fill a pot with a small amount of water and bring to a boil.
- Place the steamer basket over the boiling water, ensuring the onigiri does not touch the water.
- Cover and steam for 5-7 minutes until heated through.
Pan-frying method:
- Heat a non-stick pan over medium heat and add a small amount of vegetable oil.
- Place the onigiri in the pan and cook for 2-3 minutes on each side until crispy and heated through.
- Optionally, brush with a bit of soy sauce for added flavor.
Oven method:
- Preheat the oven to 350°F (175°C).
- Wrap the onigiri in aluminum foil to prevent drying out.
- Place on a baking sheet and heat for 10-15 minutes.
- Check to ensure they are heated through before serving.
Best Tools for Making Onigiri
Rice cooker: A convenient appliance to cook the Japanese short-grain rice to perfection, ensuring it has the right texture and stickiness.
Measuring cups: Essential for accurately measuring the rice and water to achieve the correct rice-to-water ratio.
Strainer: Used to rinse the rice under cold water until the water runs clear, removing excess starch.
Mixing bowl: Handy for holding the rinsed rice before transferring it to the rice cooker.
Wooden spoon: Ideal for fluffing the cooked rice without crushing the grains.
Cutting board: Provides a clean surface to cut the nori sheets into strips.
Sharp knife: Necessary for cutting the nori sheets into precise strips.
Small bowl: Useful for holding water to wet your hands while forming the rice balls.
Salt shaker: Makes it easy to sprinkle salt on your wet hands before shaping the rice.
Can opener: Required if you are using canned tuna as a filling.
Spoon: Helps in scooping the tuna and mixing it with mayonnaise if you choose to use this filling.
Plastic wrap: Optional, but can be used to help shape the rice balls neatly and keep them fresh.
How to Save Time on Making Onigiri
Prepare the filling: Mix the tuna and mayonnaise in advance to save time when assembling the onigiri.
Use a rice cooker: Cooking Japanese short-grain rice in a rice cooker ensures perfect texture and frees up your time for other tasks.
Cool rice quickly: Spread the cooked rice on a baking sheet to cool it faster, making it easier to handle.
Wet hands: Keep a bowl of water nearby to quickly wet your hands, preventing the rice from sticking.
Pre-cut nori: Cut the nori strips in advance to streamline the wrapping process.
Onigiri Japanese Rice Balls Recipe
Ingredients
Main Ingredients
- 2 cups Japanese short-grain rice
- 2.5 cups Water
- 1 teaspoon Salt
- 4 sheets Nori (seaweed) cut into strips
- 1 can Tuna optional, for filling
- 2 tablespoon Mayonnaise optional, for filling
Instructions
- Rinse the rice under cold water until the water runs clear.
- Cook the rice in a rice cooker with the water.
- Once cooked, let the rice cool slightly.
- Wet your hands with water and sprinkle with salt.
- Take a handful of rice and form into a ball or triangle shape.
- If using a filling, make an indentation in the rice ball, add the filling, and cover with more rice.
- Wrap a strip of nori around the rice ball.
- Repeat with the remaining rice and fillings.
Nutritional Value
Keywords
More Amazing Recipes to Try 🙂
- Thai Chicken Larb Recipe25 Minutes
- Italian Chicken with Garlic and Lemon Recipe40 Minutes
- Southern Pimento Cheese Recipe15 Minutes
- Tortas Recipe30 Minutes
- Grain Bowl with Shrimp Avocado and Black Beans Recipe25 Minutes
- Italian Almond Macaroons Recipe35 Minutes
- Italian Risotto Con Quaglie Recipe1 Hours
- Dump Cake Recipe55 Minutes
Leave a Reply